I bet you've all been wondering how this build has been going and I have been meaning to update the blog with where its at right now. Well we have a Roof! So thats a start. Its also been waterproof wrapped as we now head into Autumn, so even though its not weather-tight quite yet its still keeping the recent rain off the framing and most of the interior. Next week the Brick exterior cladding starts, the windows are due, and we are also about to spend time with the electrician deciding on the lights, light switches and power points etc. I will update a bit more on that further in the blog but first lets do a photo timeline update so you can all go OOH & AAH at it 😀
Photo Timeline
Week One
 |
| Week One - Day One - Excavation Starts |
 |
| Week One - Day 5 - the rib raft floor starts |
Week Two
 |
| Week Two - Day 1 - the rib raft framing is down |
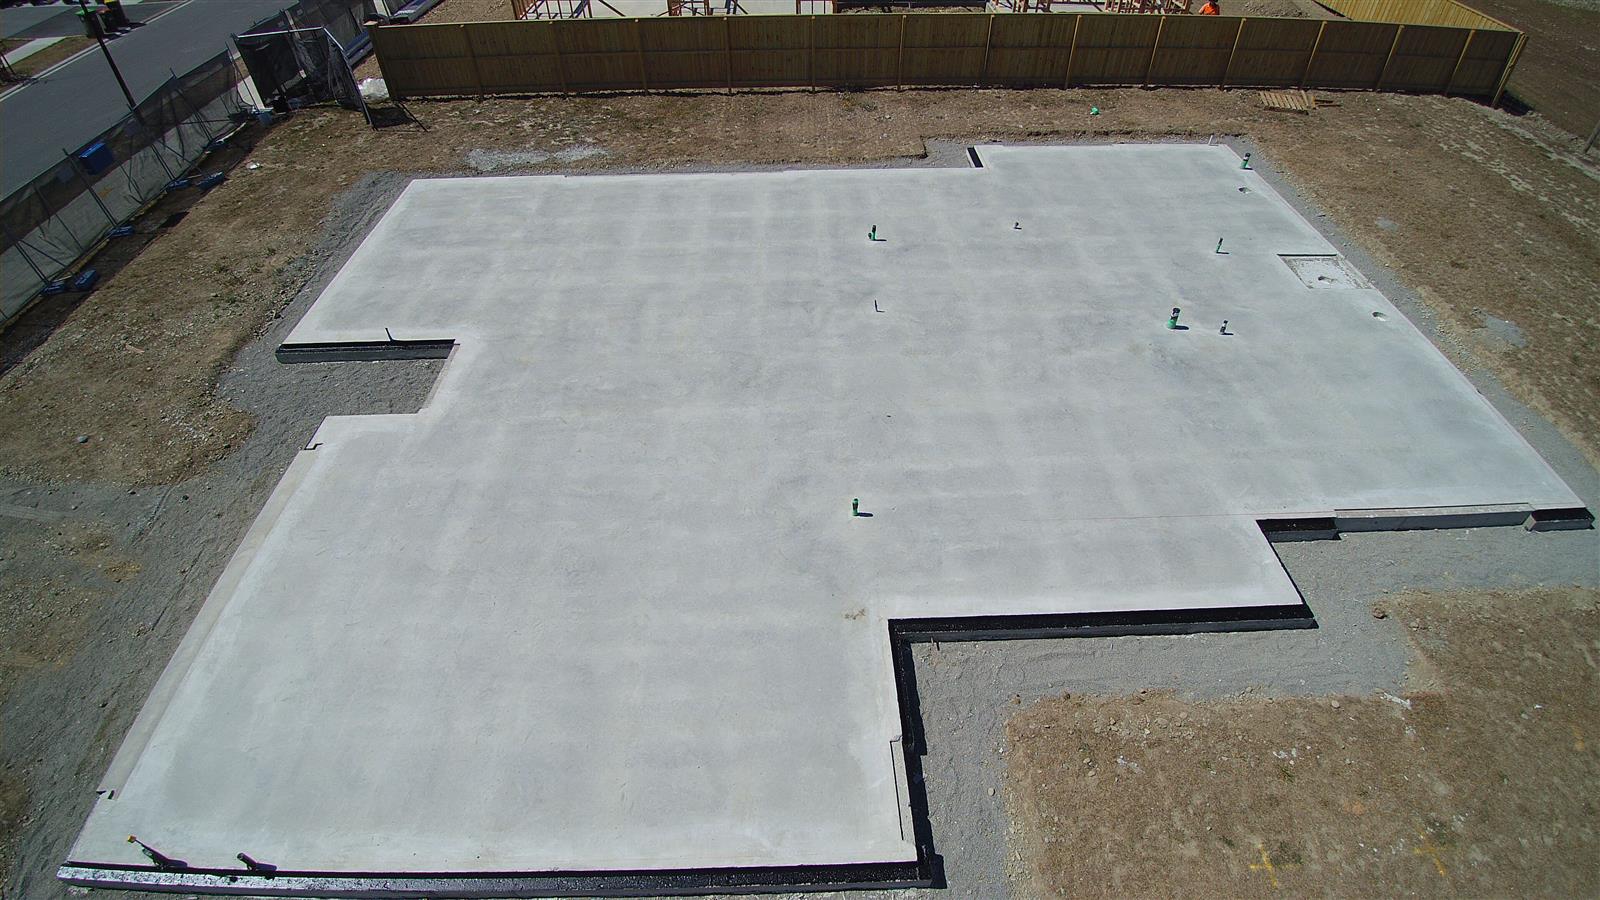 |
| Week two - Day 3 - the Concrete Slab is done |
Week Three
The framing begins:

 |
| And Aerial shot taken by our builder showing the frame - it looks so like the plans! |
Week Four
 |
| Looking at the spot the large sliding doors will go (this is the side of the house) |
 |
| Looking at the front of the house the lounge windows to the left and the front entrance in the middle |
Week Five
 |
| An Aerial view of the trusses for the roof |
 |
| The scaffolding is up and the roof goes on soon |
 |
| The front of the house is now starting to look like a house |
Week Six
 |
| The roof is done! The waterproof wrap is being done and the scaffolding will come down soon |
 |
| Week 6 - Day 5 - the framing for the gib is already going into the garage - soon they will start to line the interior |
Whats due next?
Well its Autumn here and the weather is starting to settle in so its great that they got the roof on when the weather was better and they will have a more or less dry area to work in. In the next few weeks they will be pre-wiring the house, starting to put up the battens for the gib (drywall), reinforcing the walls where we want shelving or things hanging from the wall like rails, and obviously the exterior starts to come together.
LifeMark Accessibility and the Electrical Walkthrough
So next week we have the Electrical walkthrough with the Electrician to work out where lights will go, power outlets, heated towel rails and other items. So the Husband has spent time going through our LifeMark assessment to make sure we have it all in hand and can spend time explaining to the Electrician just WHERE things can go.
The guidelines are quite specific. For a start, plugs can't be put within 30 cm of the floor. For 'bonus points' plugs should be at a consistent height between 50 and 120 cm from the floor, and for even more points plugs should not be within 50 cm of an internal corner.
Humm... Keeping plugs out of the corners should be fairly easy, but having them all at mid-thigh height in all rooms will be be challenging,
One thing the Husband is keen on is recessed low-intensity lighting in the hall - like what you have on stairs - with the reasoning that we are often up in the night to check in on the boy. The number and placing of these lights has become a bit contentious. He also worried about the power they would use for awhile - the LED lights are rated at 1W, but the driver losses need to be taken into account. Two 1W lights for 12 hours a day, for a month is about 1kWhr - or 20c of power. per month. Less than a cent a day to not stumble round in the dark every night is well worth while.
Talking of lighting, the location of light switches is also specified in the standard. They should be at the same height as the door handles, Must make sure that the electrician and builder agree about the handle height. We also need to have light-switches at both ends of the corridors, its giving us a small problem as we have three doors entering the end of the hall, so do not have a clear wall space to place the switch on!
We also discussed including some hard-wired panel heater, which seem like a good idea as they will be low-profile and not obstruct moving a wheelchair around, and avoid having cables over the floor. The downside is we will need to know where the furniture will be to avoid having a heater where we will want to place the bed. It is a tough call, as we tend to have a heater on overnight during winter to help avoid winter snuffles and chills. Not having these also avoids having to decide what wattage heater to install. So a compromise might be to install an extra power point where we might want to hard-wire a heater once we get settled in.
There is always so much to think about with these things its easy to get overwhelmed! One thing I still wish we'd considered was removing the wardrobe doors and turning the wardrobe into a recess we can use for 'parking' equipment. Other families have chosen to do that and it makes sense to have the wheelchair, walker and maybe the standing frame somewhere out of the way. Of course we are also in the middle of teaching the young man to self transfer to his wheelchair, his walker and possibly the bed. All this means that the equipment needs to be within easy reach. No doubt as the house progresses we'll have a clearer idea of all that.
We'll try to update again as the build progresses, thanks for stopping by to view our blog!
Vivien
Comments
Post a Comment